In the ever-evolving landscape of website design and content presentation, incorporating dynamic elements has become essential for engaging user experiences. One powerful tool that empowers WordPress users in achieving dynamic content displays is the Slider Revolution plugin. Specifically designed for self-hosted WordPress sites, Slider Revolution introduces the concept of post-based or dynamic sliders. By leveraging cleverly crafted code, this feature dynamically pulls information from WordPress posts, allowing users to seamlessly integrate categories, featured images, excerpts, and post links into their sliders. In this tutorial, we’ll delve into the intricacies of setting up a dynamic content slider using Slider Revolution, exploring the versatility it brings to the realm of web design without the necessity of a purchased license for this purpose.
This article is specific to the the Revolution Slider plugin, which is sometimes bundled with a WordPress theme or downloaded it directly from Themepunch.com/Slider-Revolution. We recommend that you purchase a license because it is loaded with extras and functionality, however, you don’t need a license to complete this tutorial.
What is dynamic content sliders in Slider Revolution
A post-based slider uses code to pull information dynamically from your WordPress (or other platforms) posts or other content. There are lots of existing and custom fields that you can use for your sliders. However, for this example, we are going to keep it simple and use Categories, Featured Image, Excerpt, and Post Link.
*This is for self-hosted WordPress sites. We are not sure if you can set this up on WordPress.com sites.
Step 1: Set Up your Posts
In the Screenshot below we add a category (Developer Notes), featured image, and excerpt to our posts.
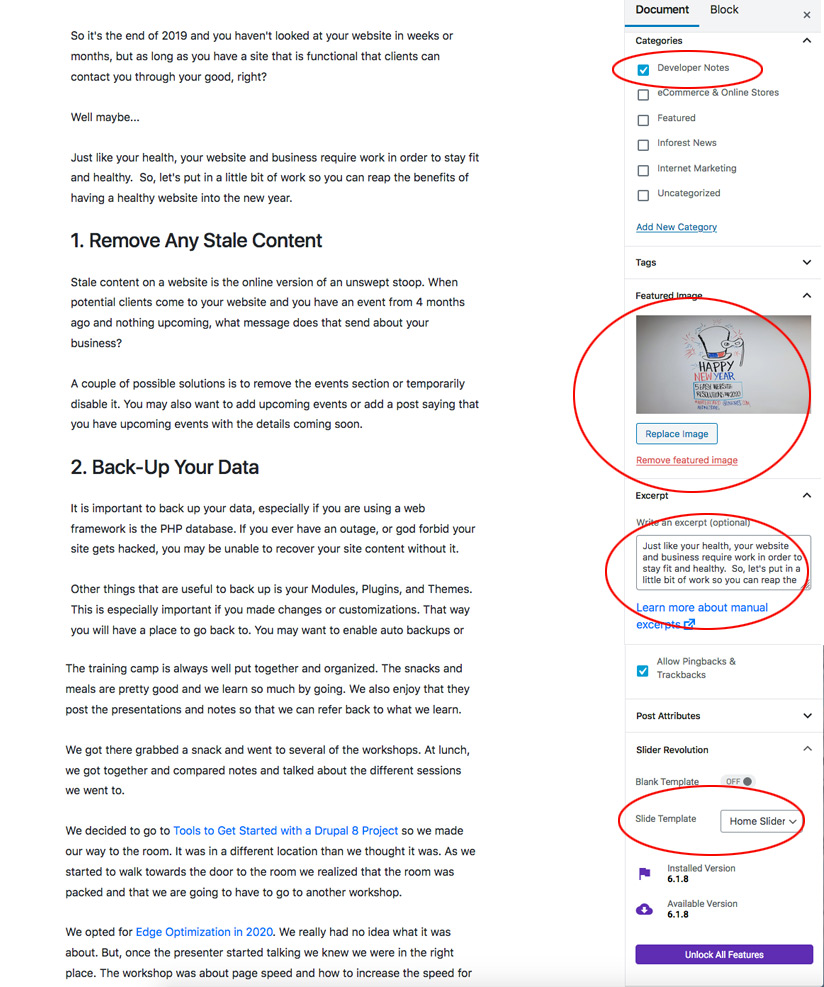
You want to create your posts or test posts with at least those field populated. It is suggested that you have at least 2 or 3 posts published so that you can see how it works. Feel free to use any category as long as it is consistent across the posts you want to include in your slider. We used the category Developer News because we have the most posts in that category. Once you have this set up go on to the next step.
** You may have to check the slide template box after you have your sliders set up for it to work.
Step 2: Set Up Your Revolution Slider using dynamic content
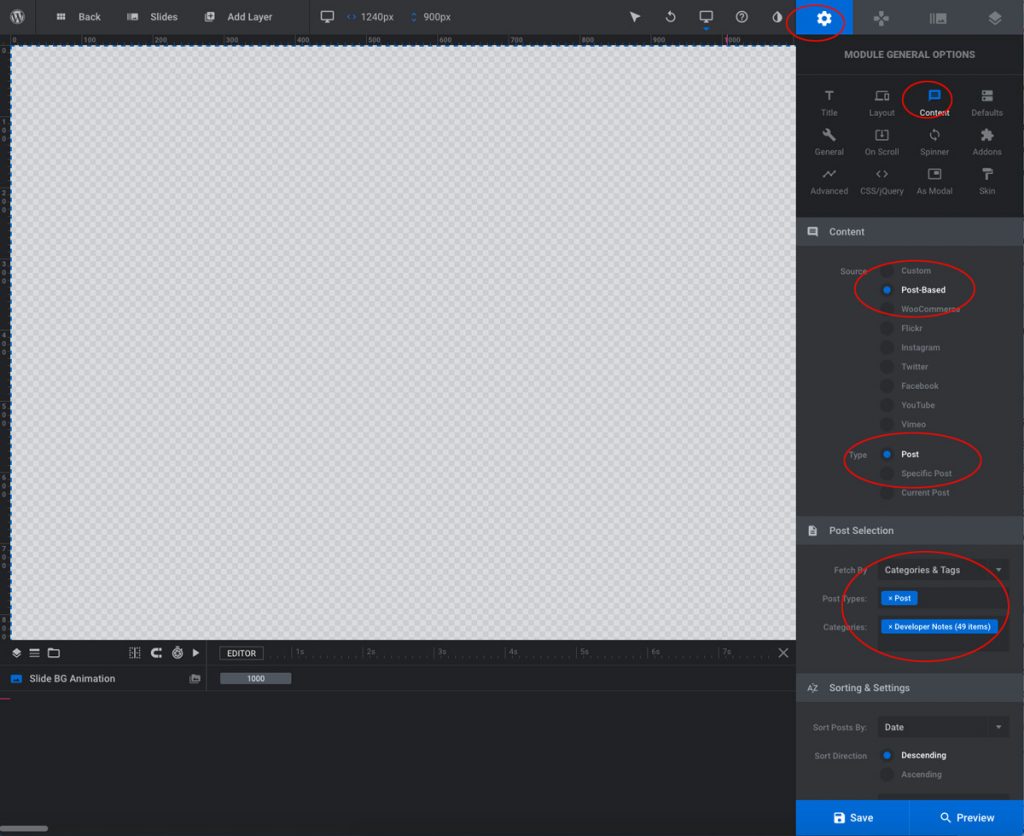
Create a Blank Slider under the settings wheel > Click Content > Post Based > Type = Post > Post Type= Post > Categories =Developer Notes (or whatever category you are using) Save
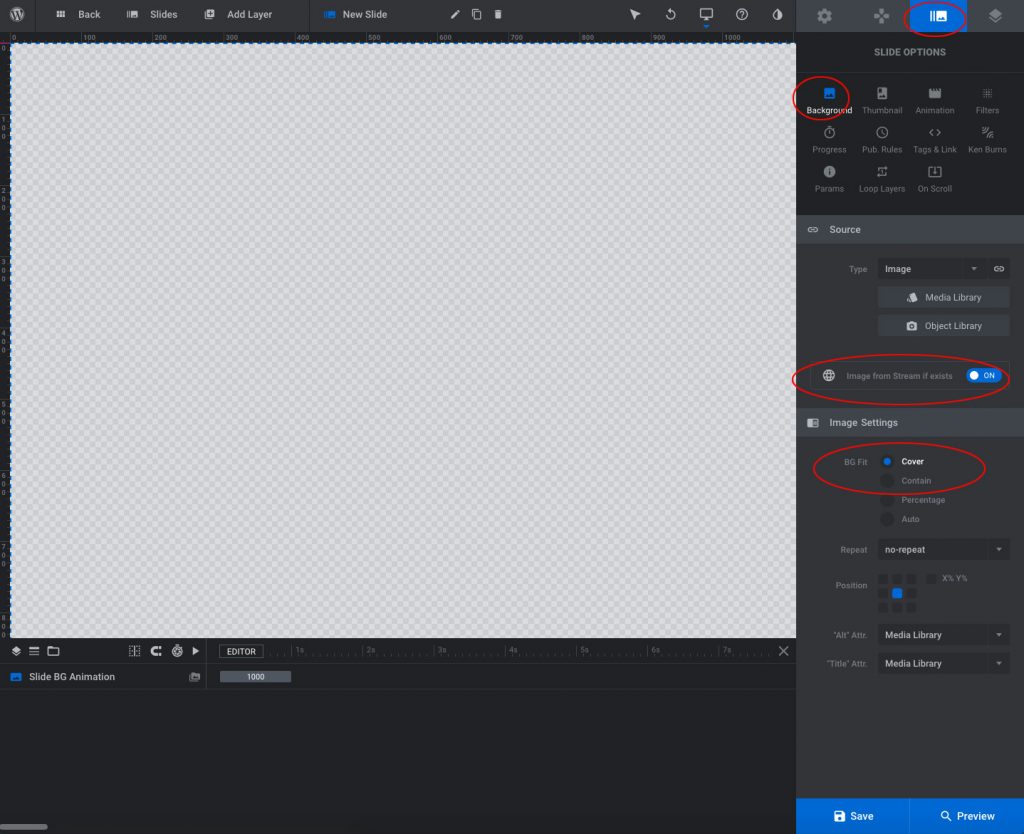
Go to the Slide Options Panel on the Top Right > Select Background > Click button “Image from steam if exists” > change whatever settings you want we like Background > Cover for this example. The background image will cover the full background of the slide
Step 3: Adding Layers
Once the background slide is set up we are going to add 4 layers: A title layer, an excerpt (text snippet), a button that will link to the post and a semi-transparent background box to help the text stand out
Title
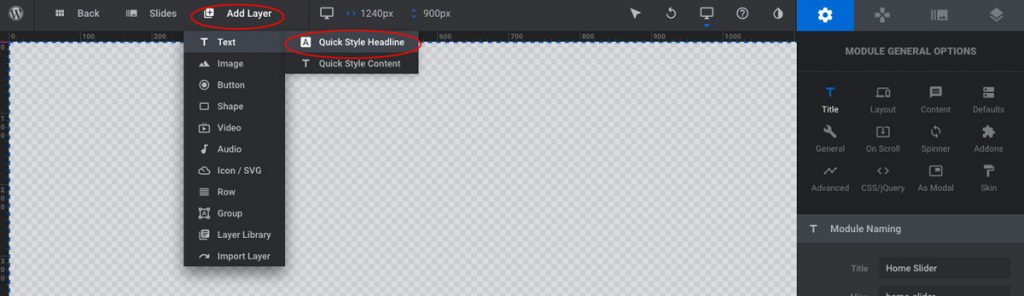
Add Layer Quick Style Headline > Choose style you want
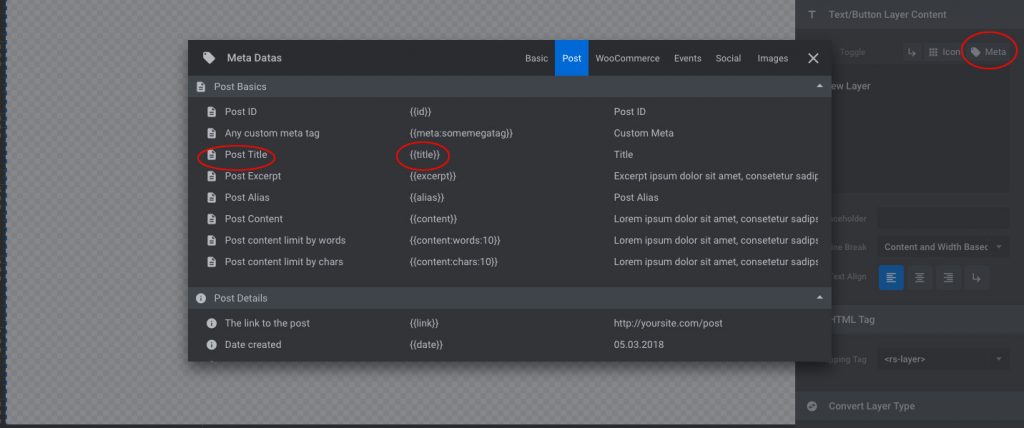
Under Content > Choose Meta > Post TItle > {{title}}
This {{title}} tag will pull the title from the post and into the slider
Excerpt
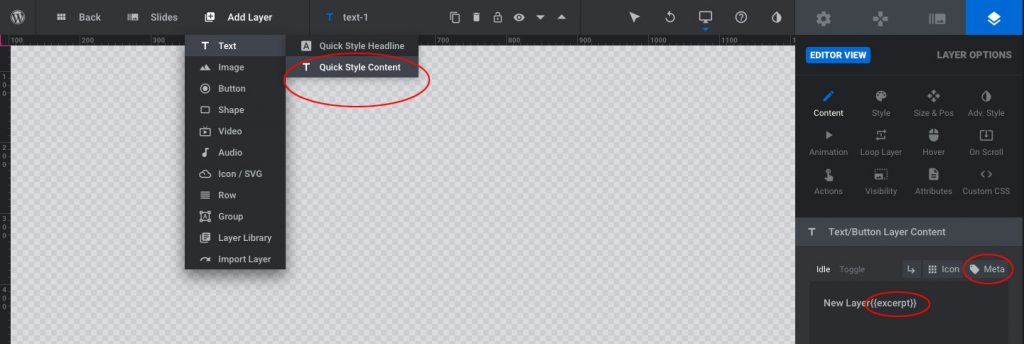
Repeat Steps for Excerpt but using Quick Style Content
Add Layer Quick Style Content > Choose the style you want
This {{excerpt}} tag will pull the excerpt from the post and into the slider
Under Content > Choose Meta > Excerpt > {{excerpt}}
Button
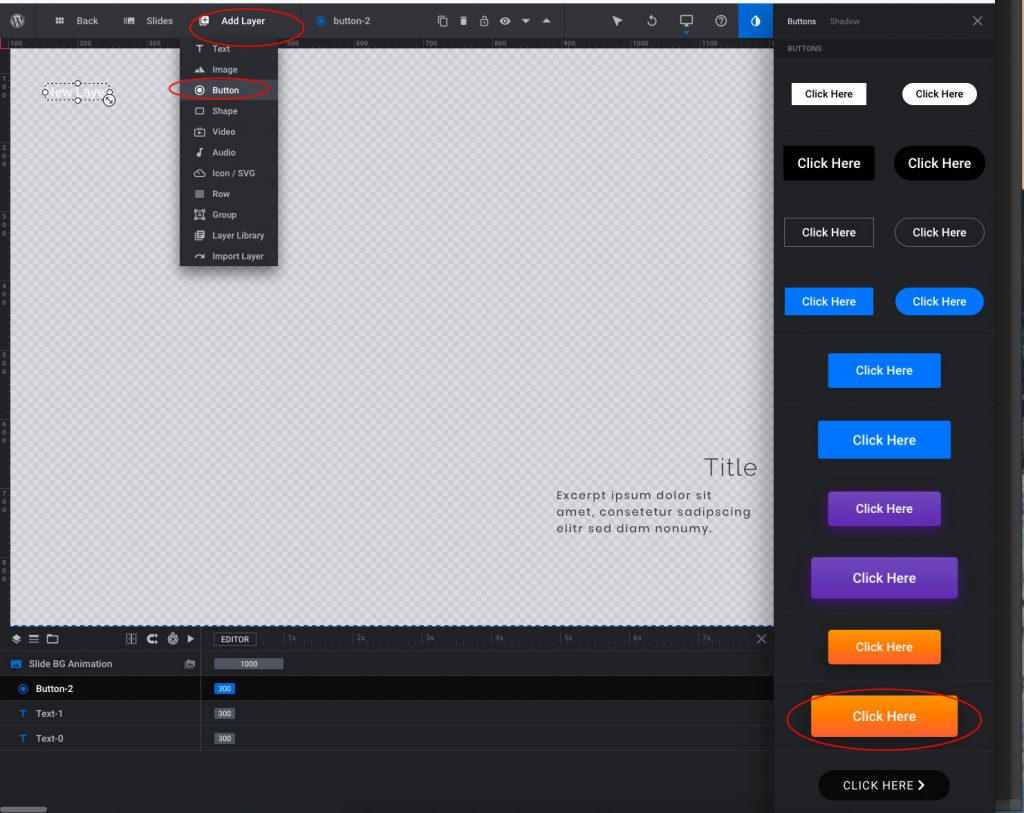
Add Layer Button > Choose the style you want
Create Action

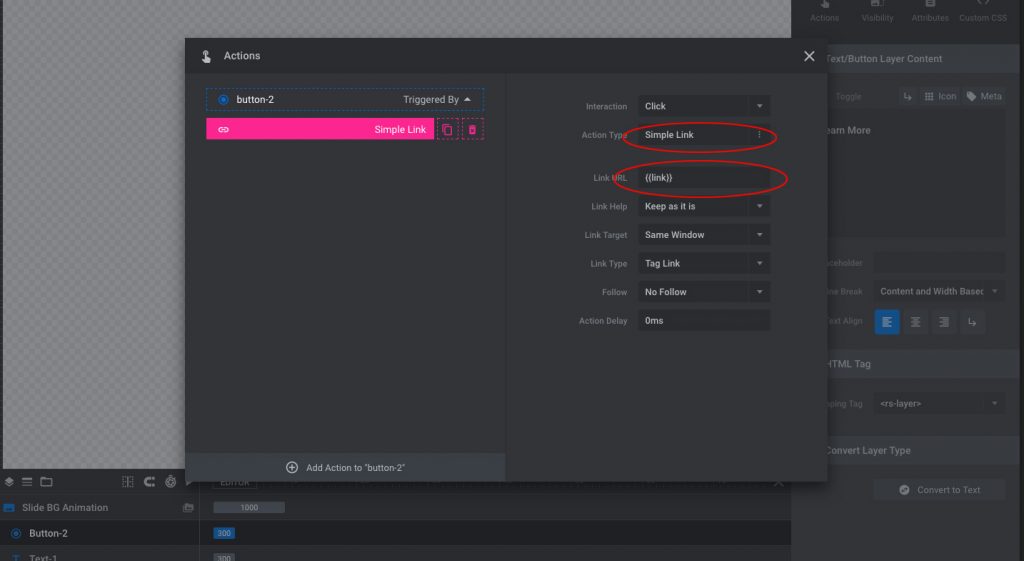
Click the Actions tab on the Button Layer and add Simple Link
Add {{link}} tag to the Link URL Field
Create Shape
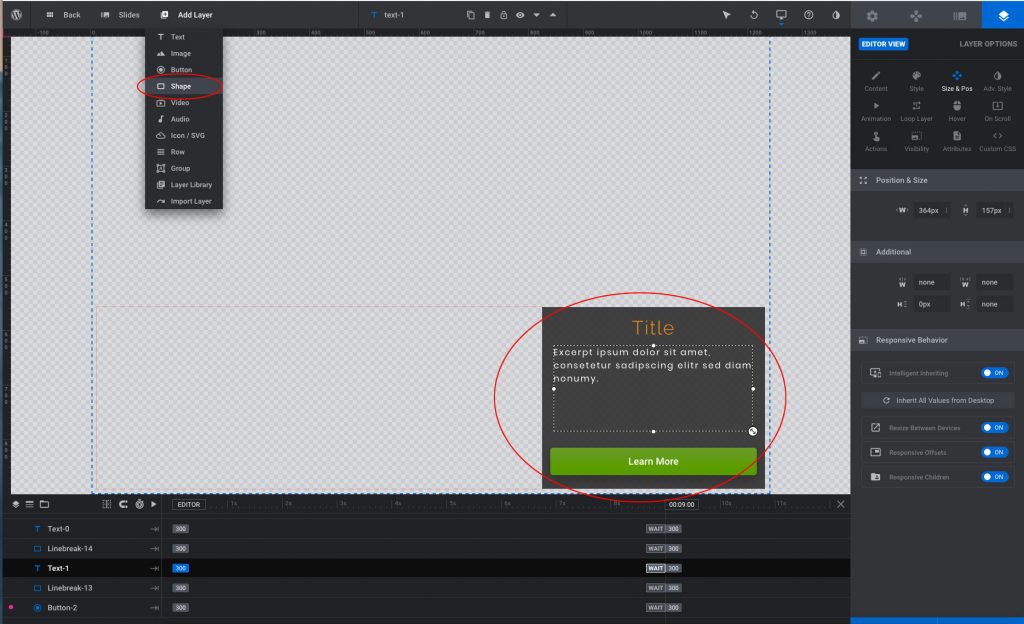
Create the Shape layer
Move and organize all of the Layers where you want them on the slideshow

Move the shape layer to the bottom so that all of your other layers are above that. Change the Transparency and the Color of the shape as desired.
Click Preview on the bottom right to see your slideshow.
** You may need to play with your positioning, padding, margins, etc

Tada! Your Slider is ready!
Now copy the shortcode and add it to your homepage, post page or template to insert it on your WordPress Site!
Check out the documentation on Theme Punch
Easy editing with WordPress Gutenberg editor
The Gutenberg WordPress editor, also called the WordPress block editor, is a new page builder included in WordPress 5.0+. The Gutenberg editor adds content blocks and page builder-like functionality to every up-to-date WordPress website.